With AWS’s S3 and CloudFront, you can quickly setup a personal static file CDN that is very reliable and fast while only costing negligble amounts of money in most situations.
However, whenever setting up a new domain, I find myself going through a number of tutorials and doing a fair bit of trial-and-error to get the configuration (especially regarding CORS) right, so I decided to finally do my own write-up for future reference.
This post will assume that you have at least some prior knowledge of AWS and not go into too much explaining of what we are doing, rather focussing on the caveats of what to watch out for.
I will setup a static file CDN for datarequests.org, a project I am currently working on with a friend of mine, whereby we want to help you exercise your rights under the GDPR.
Setting up the S3 bucket
First we need to configure the S3 bucket where we will actually store the files we want to serve.
Creating a bucket
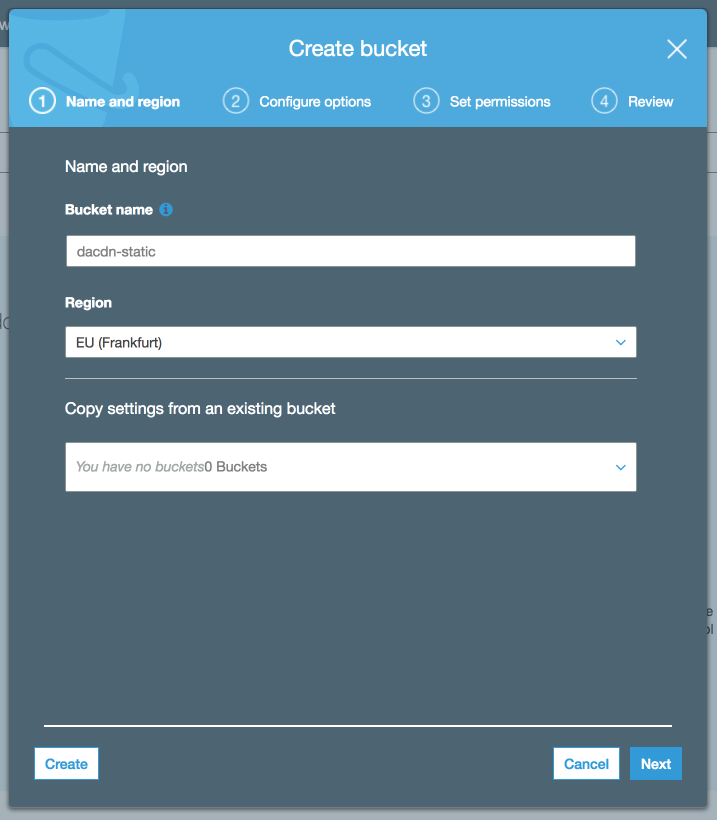
Start by creating a bucket in your desired region. Contrary to many of the other tutorials floating around, the bucket name does not need to be the domain you later want to point at it. For this post, I will be using the bucket name dacdn-static.
Leave the options in the second tab of the bucket creation wizard as the defaults.
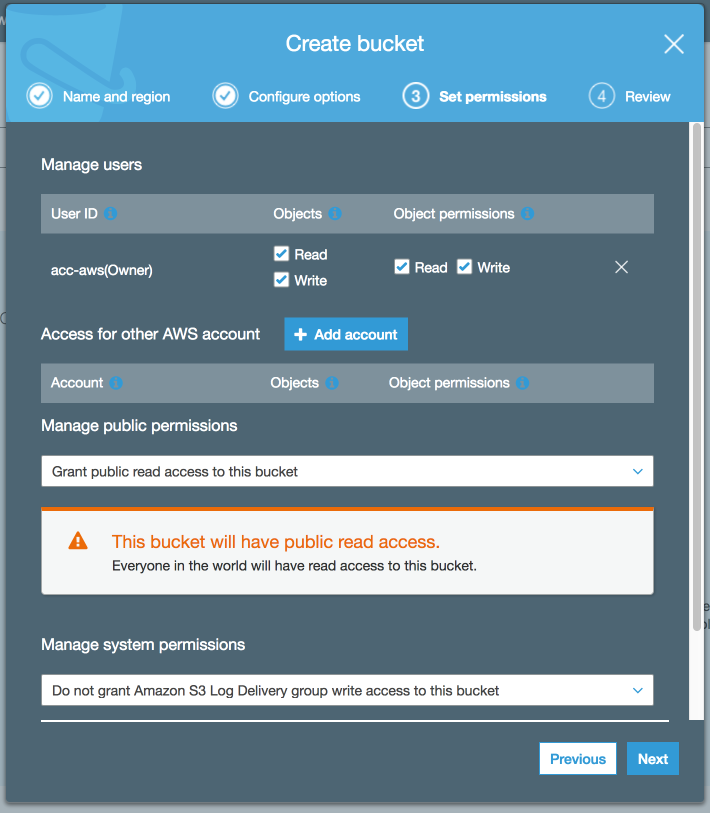
In the third tab (“Set permissions”), set the “Manage public permissions” option to “Grant public read access to this bucket”.
Finally, review your settings in the fourth and last tab and click “Create bucket”.
Enabling the bucket for static file hosting
To enable your newly created bucket for static file hosting, go into the bucket and to the “Properties” tab.
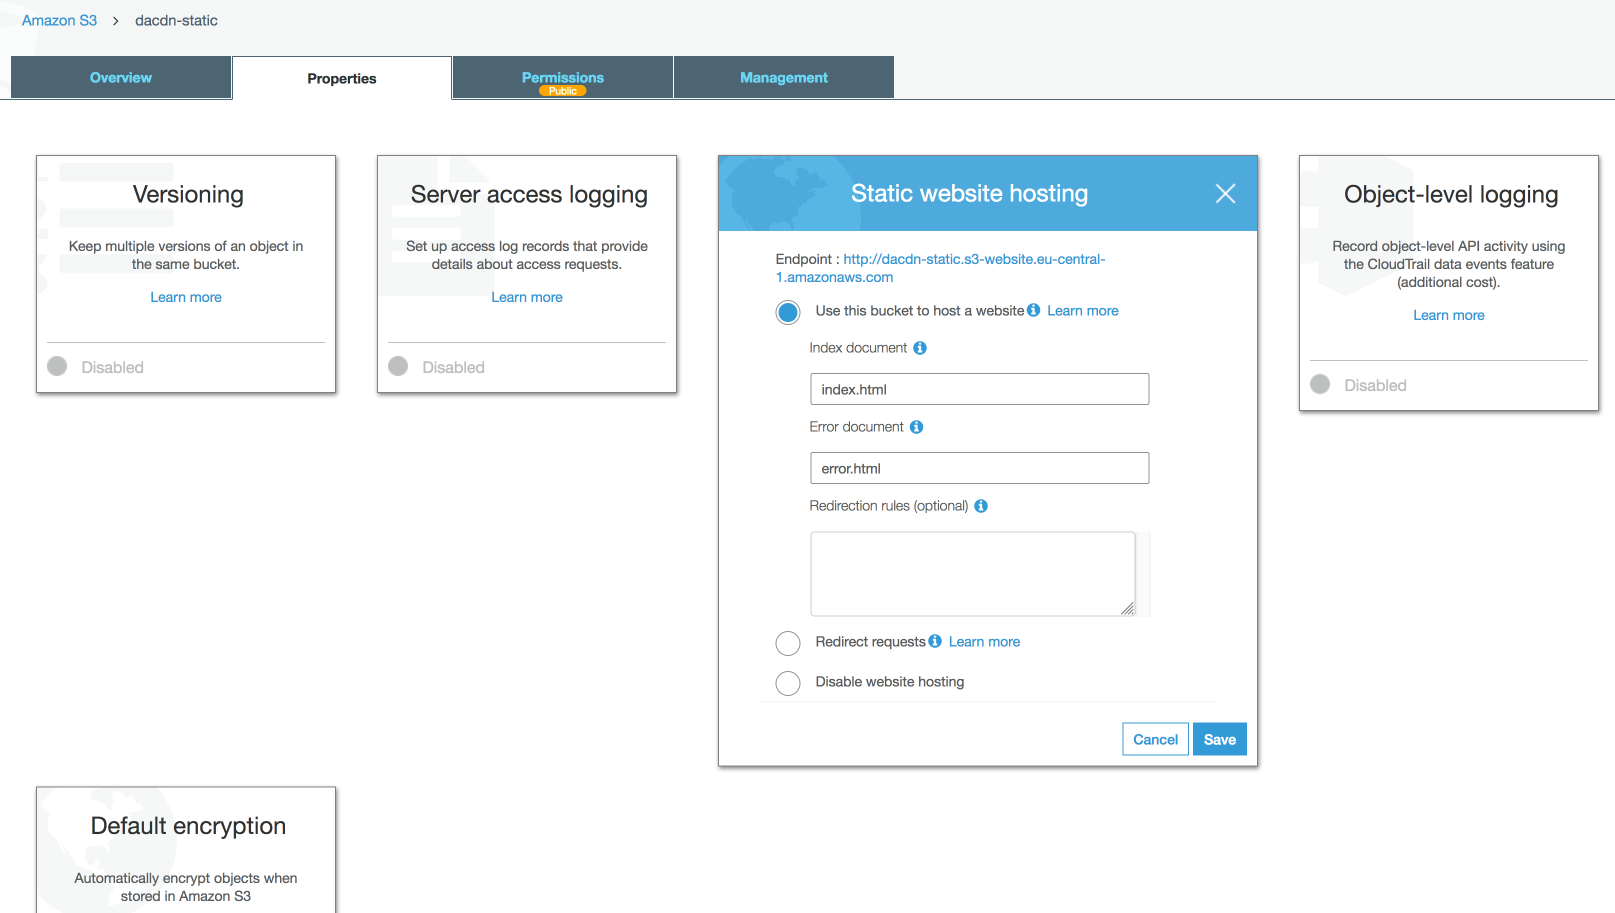
Click on “Static website hosting” and select ”Use this bucket to host a website”. The default values for the index and error document are fine, so enter them into the appropriate inputs and confirm with “Save”. You will then be shown an endpoint URL that looks like this: http://dacdn-static.s3-website.eu-central-1.amazonaws.com. Remember this URL as we will need it later on.
Configuring CORS
If you want to be able to include certain files (like fonts, for example) in websites on different domains than your CDN domain, you need to configure Cross-origin resource sharing (CORS).
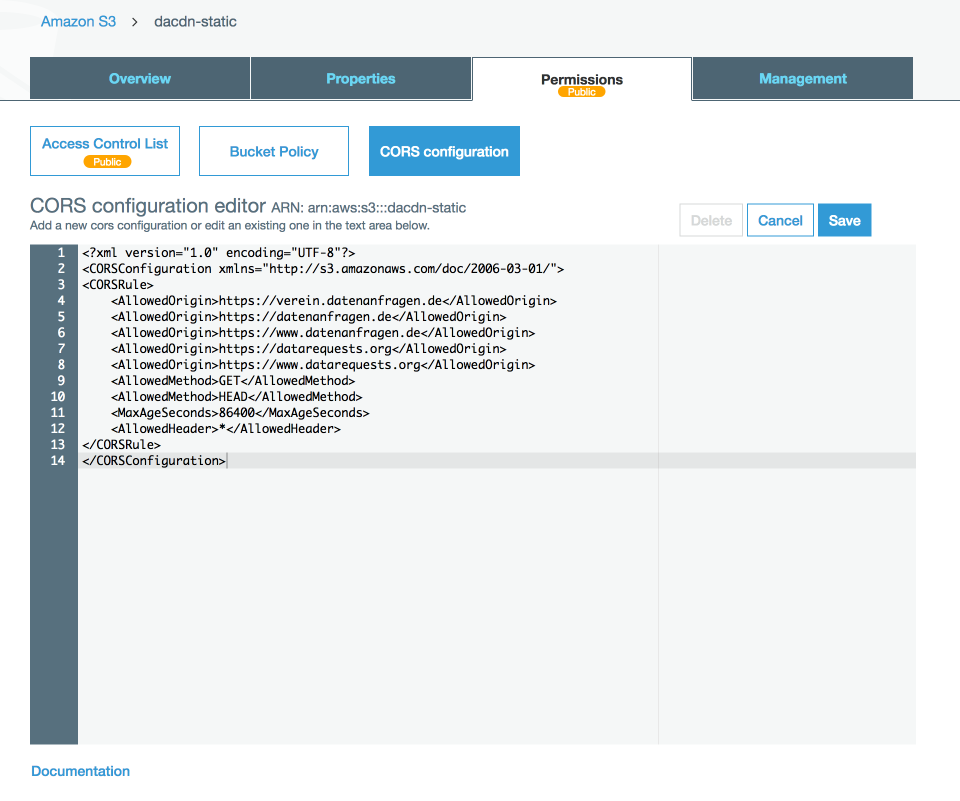
To do so, go into the “Permissions” tab and select “CORS configuration”. In the CORS configuration editor, enter your CORS policy. You can use the following one as a template:
<?xml version="1.0" encoding="UTF-8"?>
<CORSConfiguration xmlns="http://s3.amazonaws.com/doc/2006-03-01/">
<CORSRule>
    <AllowedOrigin>https://www.datarequests.org</AllowedOrigin>
    <AllowedMethod>GET</AllowedMethod>
    <AllowedMethod>HEAD</AllowedMethod>
    <MaxAgeSeconds>86400</MaxAgeSeconds>
    <AllowedHeader>*</AllowedHeader>
</CORSRule>
</CORSConfiguration>
For each website include a new <AllowedOrigin> tag. Note that a website includes both the scheme (i.e. HTTP or HTTPS) and the subdomain, so be sure to include a separate entry for each configuration you want to support. If you want to test your test your CDN locally, also include origins for your local webserver (like http://localhost or http://10.0.0.5:1313).
You can also set <AllowedOrigin>*</AllowedOrigin> which would allow all origins but be aware that this will also allow third-party sites to include assets from your CDN, costing you bandwidth.
Once you have finalized your CORS configuration, click “Save”.
Requesting a certificate in Certificate Manager
Next up, we will need to request a certificate for our CDN domain using Certificate Manager, so go into that tool. On the start page, select “Get started” under “Provision certificates”. Next, select “Request a public certificate”.
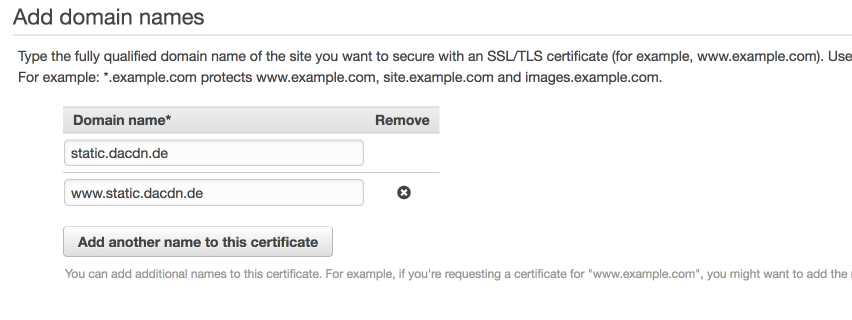
Add all domains (and subdomains) you want to have included in the certificate. This may include wildcards.
Finally, verify the domains either via DNS or email. Wait until the certificate is issued before you proceed to the next step.
Setting up the CloudFront distribution
Now, we can create a CloudFront distribution for our bucket. Go into CloudFront and select “Create distribution”, then select “Web”.
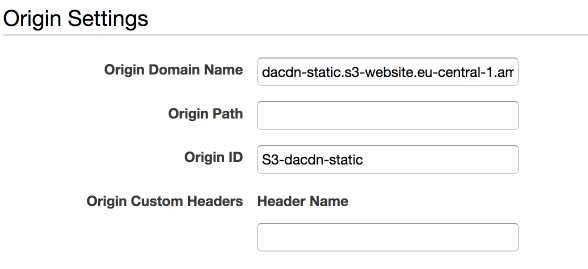
For the “origin domain name”, enter the endpoint URL (also called website endpoint) from earlier. Don’t use the URL from the dropdown, as that is a REST API endpoint and there are some differences between the two. The REST API endpoint is for automated access to your files, while the website endpoint is optimized for access from a browser, which is what we want.
Feel free to pick a more readable origin ID than the one that Amazon generates automatically.
Of course, we want to be a good website citizen, so select “Redirect HTTP to HTTPS” under “Viewer protocol policy”.
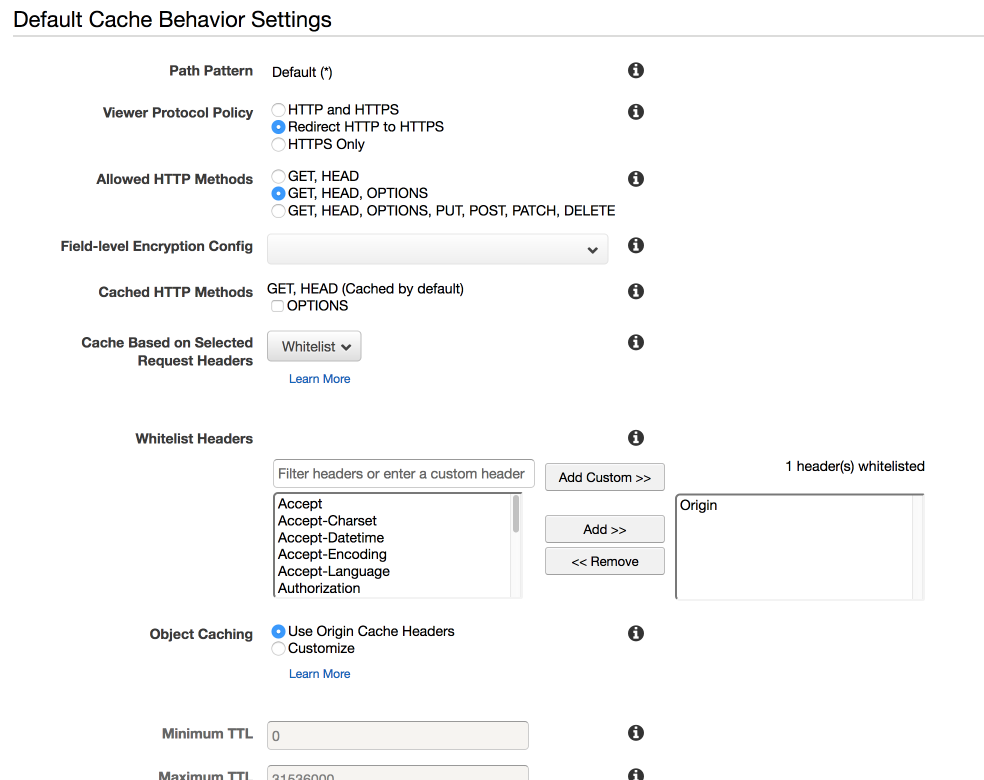
These next two steps are easy to miss but important in order for CORS to work properly. In the “Default cache behavior settings” under “Allowed HTTP methods”, select “GET, HEAD, OPTIONS” as OPTIONS requests are used for CORS. In addition, we also need the Options header, so select “Whitelist” for “Cache based on selected request headers” and then add the “Origin” header to the list that appears below.
If you want to, you can enable “Compress objects automatically”.
Next, select your desired price class.
Then, add your desired domain name under “Alternate domain names (CNAMEs)”. For me that is static.dacdn.de.
Under “SSL certificate”, select “Custom SSL Certificate (example.com)” and choose the certificate you requested in the previous step from the dropdown.
Under “Default root object”, enter the same value you used for S3, probably index.html.
Finally, click “Create distribution”. That process will take a while but you can continue with the next step in the meantime.
Configuring the DNS settings
We now need to point our CDN domain to the CloudFront distribution. To stay with AWS, you could use Route 53 for DNS but I find that option too pricey.
Whatever DNS provider you choose, set the CNAME (or ALIAS) record for your CDN domain to the domain name shown in the list of your CloudFront distributions (for me, that is d3fl6fsjbw98pw.cloudfront.net).
Wrapping up
And that’s all there is in terms of setup. As soon as the CloudFront distribution has been created and the DNS changes have propagated, you are ready to use your new static file CDN.
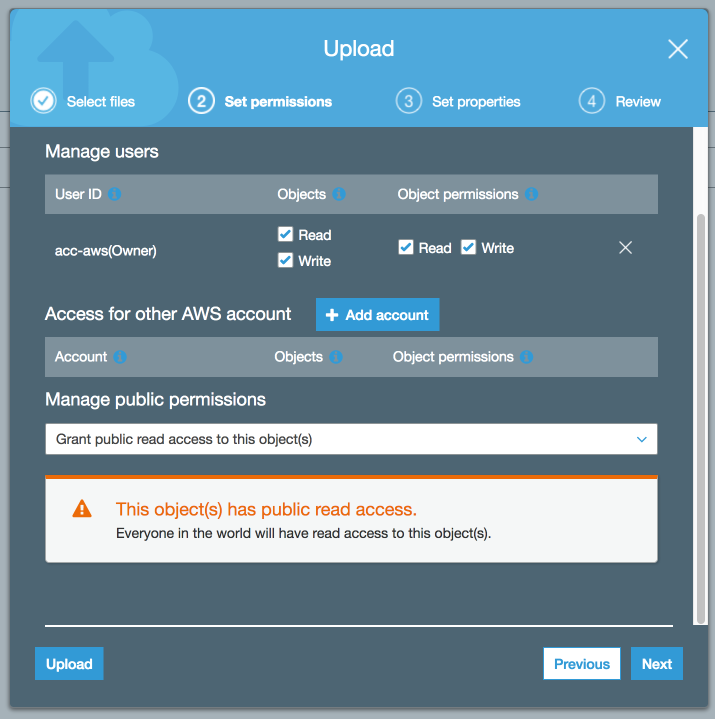
When uploading files to your bucket, make sure to grant public read access to the objects if you want them to be accessible from the web, otherwise they will just show a 403 error.
If you want to, you can upload custom index.html and error.html documents in the root of your bucket that will be shown to users when they visit your bare CDN domain or get an error, respectively.
I hope this post was helpful to you. Enjoy your new CDN!