I love Time Machine. For years, I have been backing up my MacBook to an external USB 3.0 hard drive and I have never experienced any problems, neither with the backup nor the restore. Time Machine runs conveniently in the background, distracting me only when necessary (e.g. when there hasn’t been a backup in the past 10 days). Personally, I use Time Machine mainly for backups but on a few occasions, it has also served me well for restoring a previous version of a file I accidentally changed or deleted.
At the moment, I am setting up a backup server for my network and, of course, I wanted to use Time Machine here, as well. To give you a quick overview of my prerequisites:
- Debian server running Debian 7.6 wheezy, 4 TB hard drive mounted to /storage/three
- MacBook Pro running Mac OS 10.9.4, Time Machine backup configured to external USB drive
After a bit of googling, I found that it should be possible to configure Time Machine to backup to a Samba share after enabling a hidden setting. However, for me this didn’t work, so I decided to use Apple’s AFP. In the following, I am going to describe this process.
Setting up the server side
On the server, we mainly need two packages.
netatalkis going to emulate the AFP protocol (which is similar to SMB but supposedly superior in Mac-only environments)avahito emulate the Apple Bonjour or Zeroconf service which enables automatic discovery of our AFP share
To install both of them, run the following command:
aptitude install avahi-daemon avahi-discover libnss-mdns netatalk
Next, you will have to add a new user who can access the AFP share. To make things a little easier, I recommend using the same username as on your Mac.
Run the following command after replacing the values in [square brackets] with the ones appropriate for you.
useradd -d /home/[yourusername] -s /bin/bash -c "[Your full name]" [yourusername]
mkdir /home/[yourusername]
chown [yourusername] /home/[yourusername]
passwd [yourusername]
After running the last command, you will be prompted to enter a password for the user twice. Note, that you will not see the letters you type.
If it doesn’t exist already, create a folder for your Time Machine backups. In my case, this is:
mkdir [/storage/three/TimeMachine]
Finally, you will have to configure the actual AFP share. Use your favorite editor to edit /etc/netatalk/AppleVolumes.default. If you want to use nano, for example, this is the command:
nano /etc/netatalk/AppleVolumes.default
At the end of this file, you will find the following lines:
# By default all users have access to their home directories.
~/     "Home Directory"
This enables every user on your server to access their home folder (/home/yourusername) via AFP. We don’t need this for Time Machine, so you might want to remove this line but you can also leave it in there if you wish.
You will, however, need to add the following line:
[/storage/three/TimeMachine] "Time Machine backup" allow:[yourusername] options:tm
This creates a Time Machine-enabled AFP share for the directory /storage/three/TimeMachine and allows the user yourusername to access it.
You can also limit the amount of disc space Time Machine uses by appending volsizelimit. The following example allows Time Machine to take up 500 GB.
[/storage/three/TimeMachine] "Time Machine backup" allow:[yourusername] options:tm volsizelimit:[500000]
Once you are done, save the file and close your editor (for nano: Ctrl + O, Enter, Ctrl + X).
The final thing to do on the server is to restart the netatalk service to apply the changes you made to the config file.
service netatalk restart
Setting up your Mac
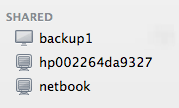
You should already see your server in Finder (Mine is called backup1).

Connect to it and mount your share Time Machine backup. You will be prompted to enter the credentials for the user you created a minute ago. I recommend saving the details to your keychain.
As your Debian server is not an officially supported Time Machine backup destination, it might not show up in the Time Machine preferences. To fix that, run the following command in the Terminal. This might not be necessary on every Mac and you can try and continue without it but in case it doesn’t work, run the command.
defaults write com.apple.systempreferences TMShowUnsupportedNetworkVolumes 1
Now, all that’s left to do is to configure a regular Time Machine backup to your AFP share.

And that’s all there is. I hope this tutorial helped you.